 1.
1. 2.
2. 3.
3.
4.
 5.
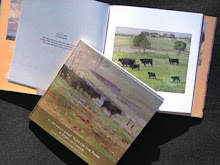
5."Stepsof Shapes"___a lesson
We set aside the still lifes today . The second group of artists has almost finished these and will move on to working with a model on Monday. (tomorrow is our day off...I will paint!)...I did this little step by step study to demonstrate how to take a complex area from start to finish. see photos above:
1.Your eye must see the simplest shapes possible. Isolate the shapes of LIGHT and SHADOW
2. Put in the basic color of the Light area and the shadow area. Compare them and adjust color so they look right at a glance.
3. Background color should be in place so that its color can be used to mix into the colors of the objects. In this case, the bunch of grasses (oats).
4. KEEP THESE BIG SHAPES intact (mostly) and pit a few strands of grasses here and there (randmly...NO PATTERNS, please!). These few details serve the purpose of describing the form. All you need is a few details to say that the whole shape is grass. Be careful to not make big blobs for seed heads. (the blob at left is "what to NOT do".
Study the real thing to match the size, shape and "character" of the details, so that you do not succumb to "what you know"...
GOOD LESSON!


No comments:
Post a Comment